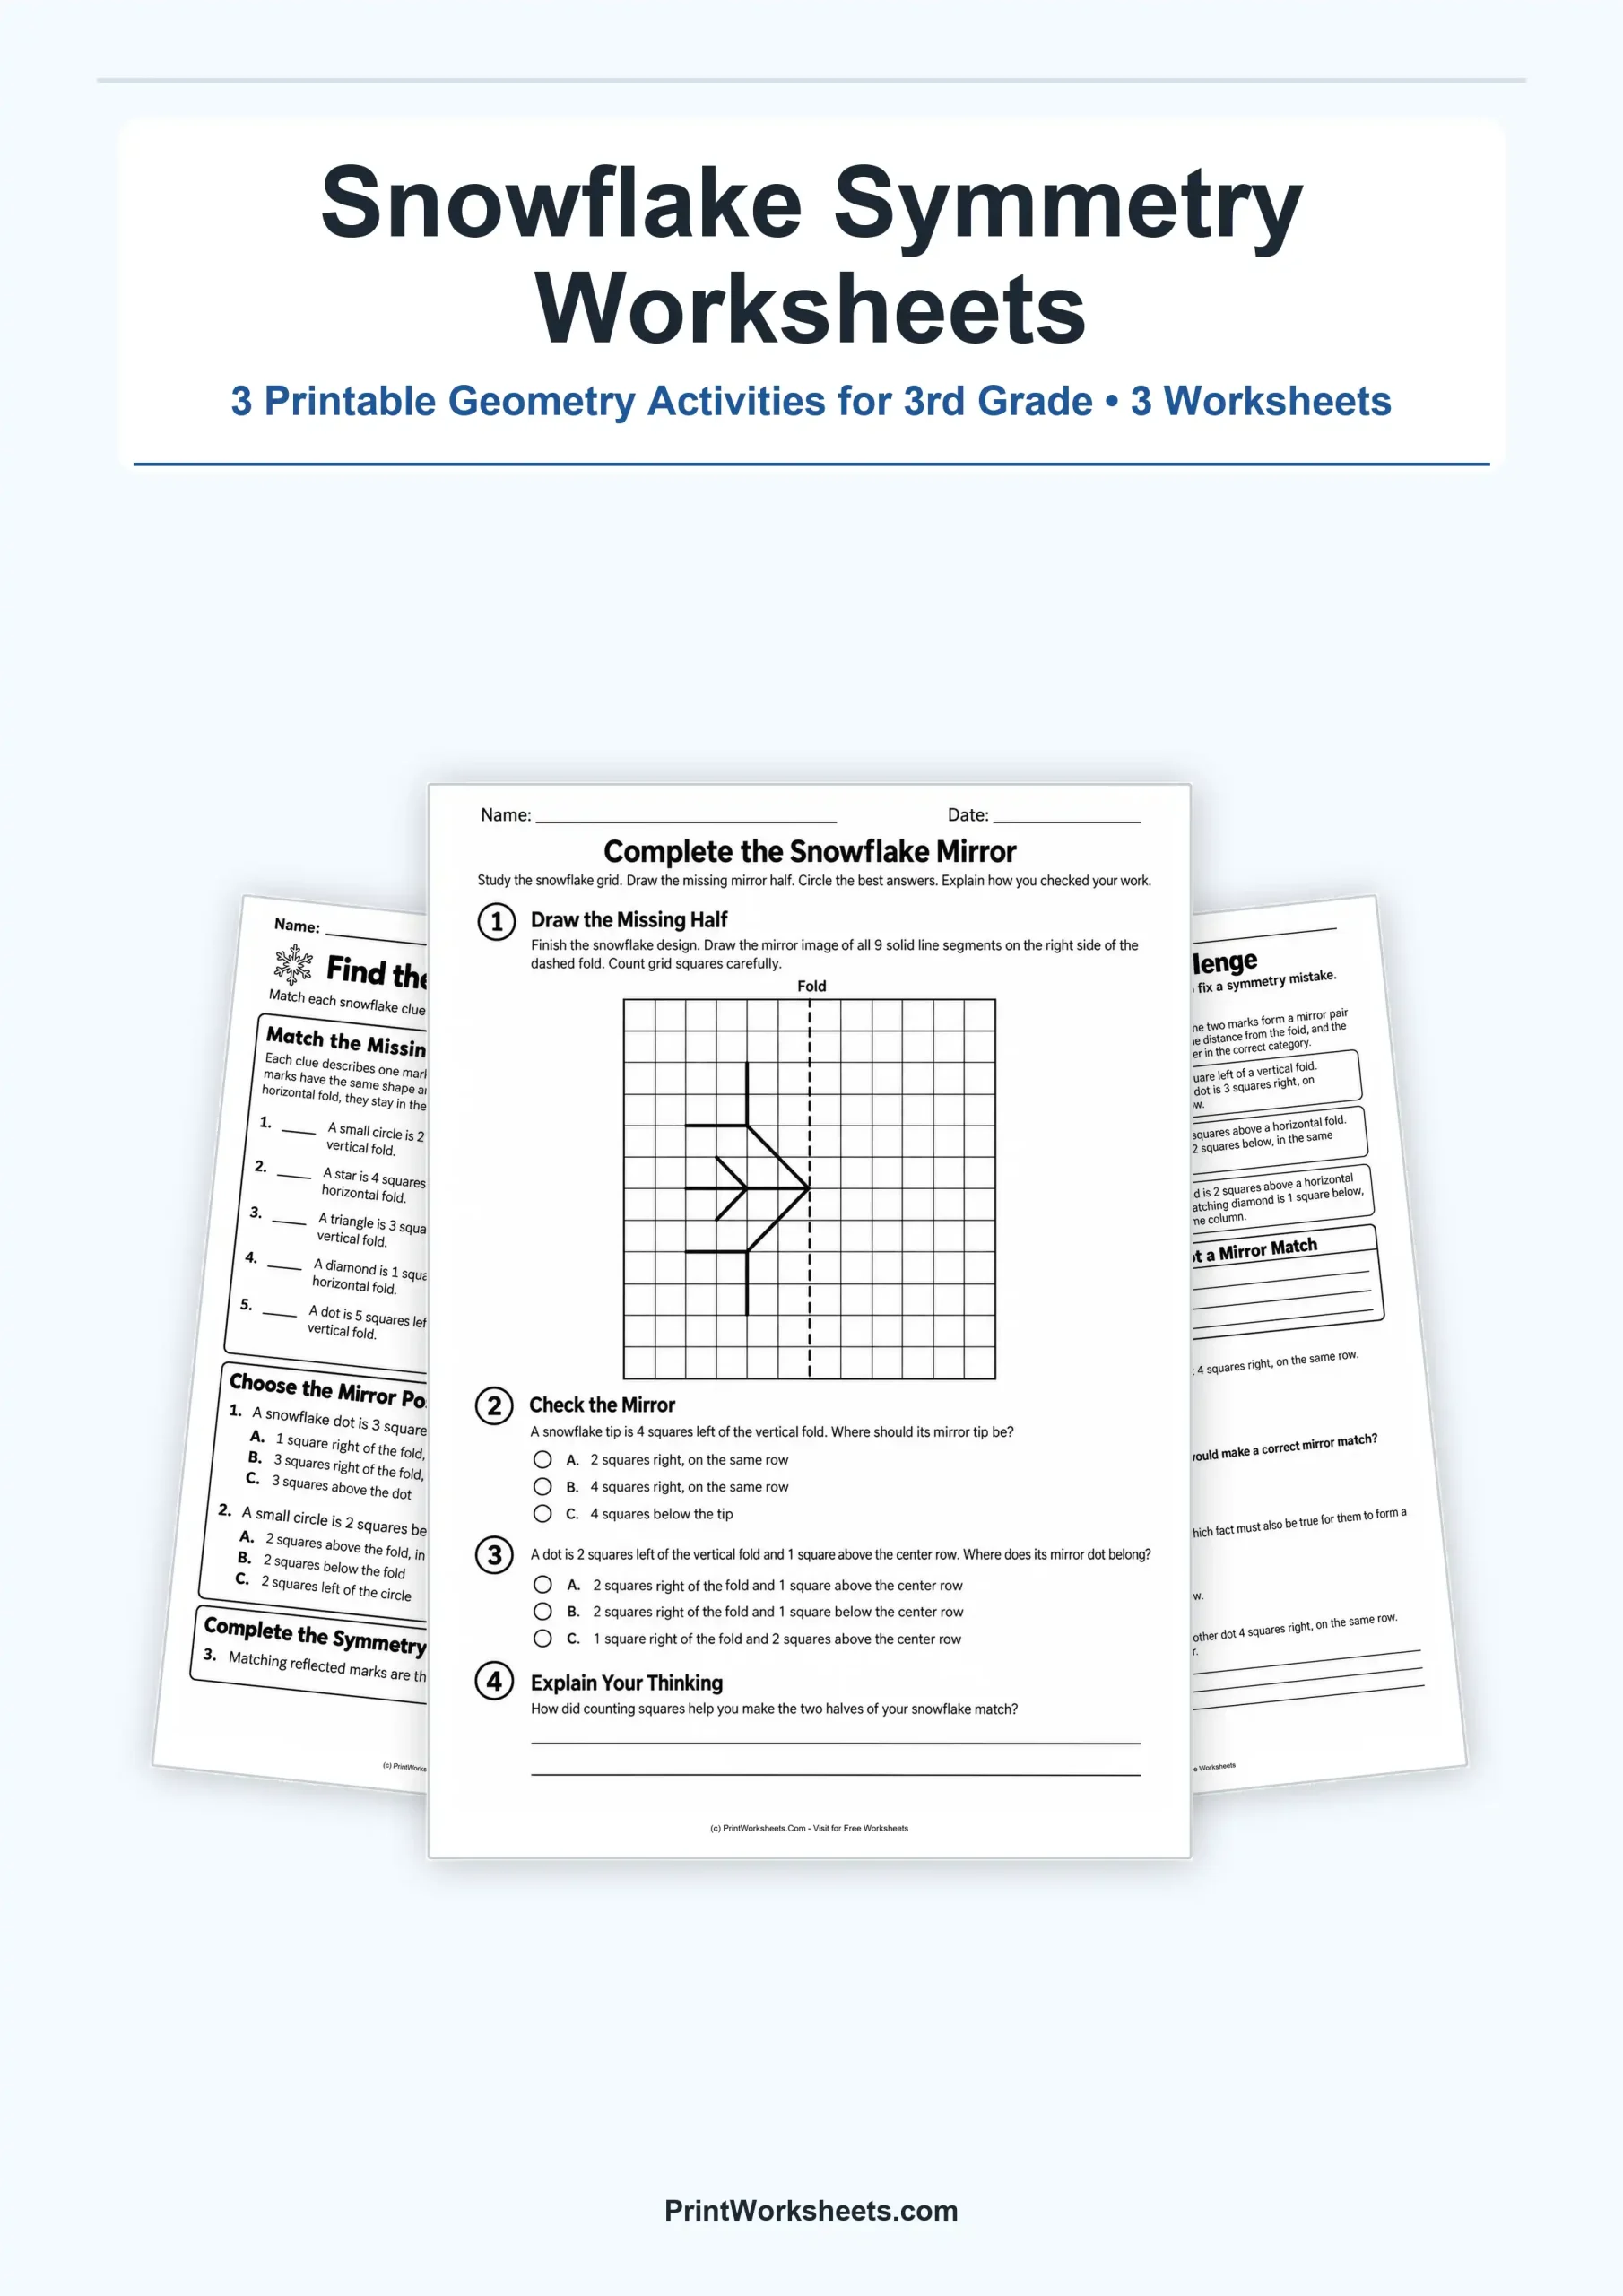
A snowflake mark sits three squares to the left of a fold. Where should its matching mark appear? Exactly three squares to the right, on the same row. This simple observation is the starting point for our snowflake symmetry worksheets, a three-page printable collection designed for 3rd grade students learning how reflections work. Children move from identifying mirror positions to completing a geometric drawing and explaining why certain arrangements are not symmetrical.
Snowflake Symmetry Worksheets for Third Grade
Line symmetry becomes easier to understand when students can count spaces and compare positions instead of relying only on whether two shapes look alike. These activities use vertical and horizontal folds, familiar geometric marks, and a square grid to make the rules of reflection observable. The pages combine matching, multiple-choice reasoning, drawing, classification, and short written explanations. Each worksheet approaches the same mathematical idea differently, allowing teachers to see whether students can recognize, construct, and evaluate symmetrical arrangements.
Find the Snowflake Mirror Marks
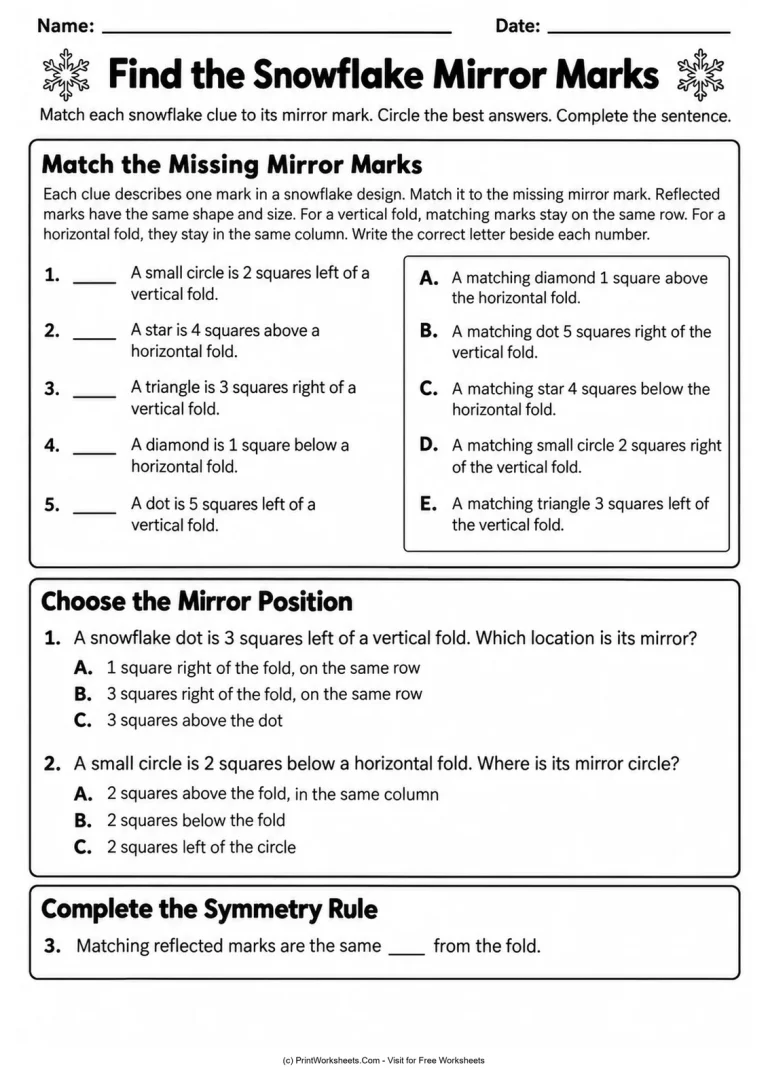
The first worksheet begins with five matching clues. Students examine a small circle, star, triangle, diamond, and dot positioned at stated distances from either a vertical or horizontal fold. They match each description to the corresponding reflected position. For example, a star four squares above a horizontal fold must appear four squares below it, while a triangle three squares right of a vertical fold belongs three squares left on its reflected side.
Two multiple-choice questions then ask students to select the correct location for a reflected dot or circle. The final sentence completion reinforces the important vocabulary of equal distance from a fold. This page works especially well for checking whether children understand the difference between a vertical reflection, which preserves the row, and a horizontal reflection, which preserves the column.
Complete the Snowflake Mirror on a Grid
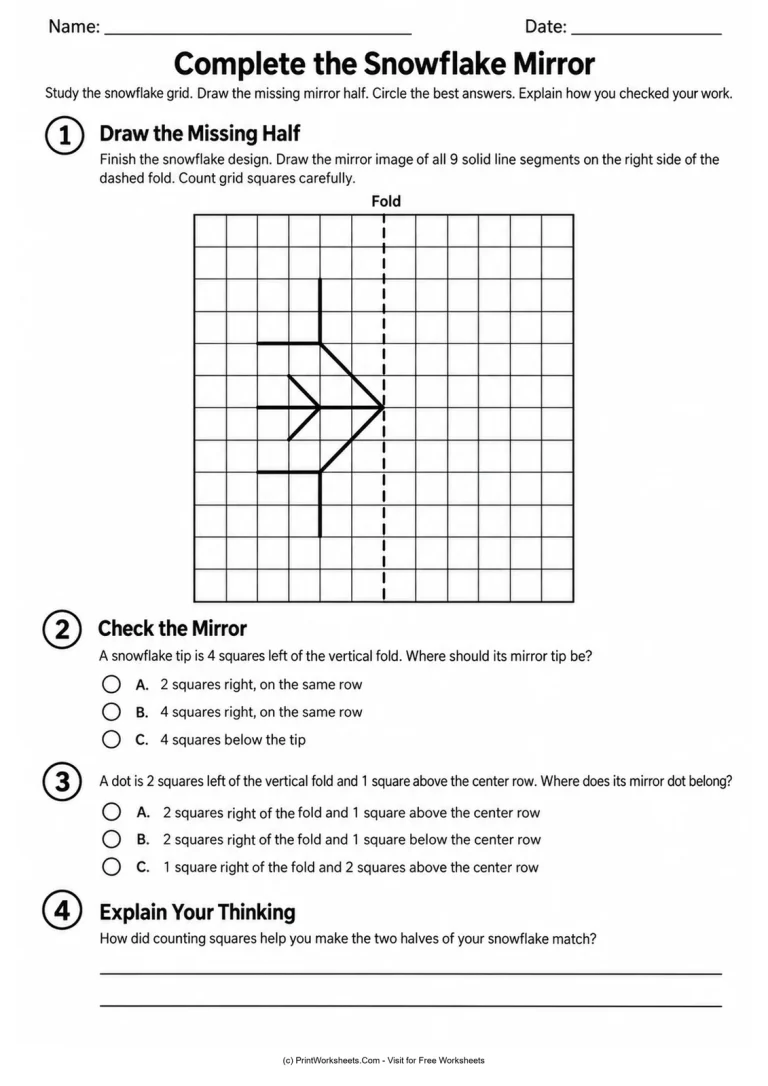
The second worksheet turns the reflection rule into a hands-on geometry task. A square grid contains a dashed vertical fold and a snowflake-inspired design made from nine solid line segments on the left side. Students draw the missing right half by reflecting the existing segments across the fold. Each line must be placed at the corresponding distance and height to create a matching design.
After drawing, students answer questions about a tip four squares from the fold and a dot located two squares left of the fold and one square above the center row. They finish by explaining how counting squares helped their two halves match. This makes the page useful for observing precision, spatial reasoning, and the ability to explain a construction method.
Snowflake Symmetry Challenge
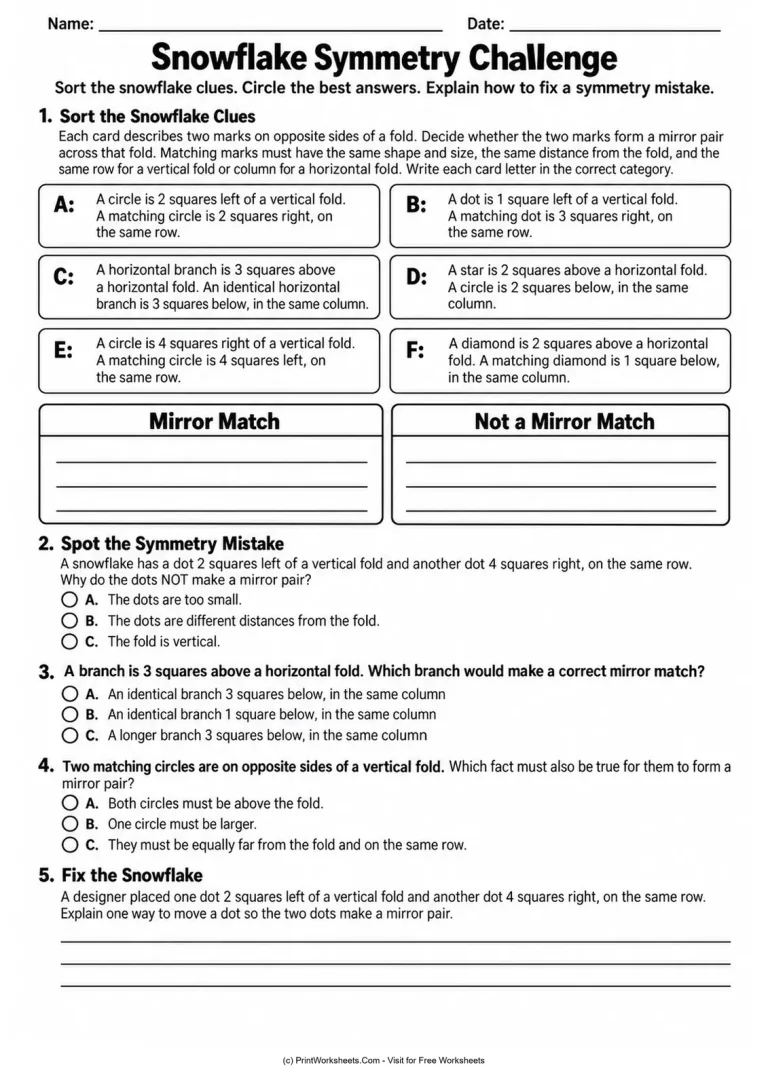
The third worksheet asks students to become symmetry detectives. Six lettered cards describe pairs of marks on opposite sides of a fold. Some have the same shape and matching distances; others contain unequal distances or different shapes. Students sort the cards into Mirror Match and Not a Mirror Match categories.
Next, three multiple-choice questions explore why two dots at unequal distances are not reflections, how to reflect a horizontal branch, and what conditions two circles must satisfy across a vertical fold. The closing writing prompt describes dots positioned two squares left and four squares right of a fold. Students explain how moving one dot could correct the mistake, showing that they understand how symmetry can be restored.
How to Teach Line Symmetry With These Pages
Start by drawing a vertical line on the board and placing a dot two squares to its left. Invite students to predict its reflected position before introducing the matching worksheet. Once they can identify correct positions consistently, move to the square-grid drawing, where the same rule controls every segment of a larger design. Finish with the challenge page to check whether they can recognize and repair errors independently.
- Introduce the rule: Reflected marks must match in shape and size and remain equally far from the fold.
- Compare fold directions: A vertical fold keeps reflected points on the same row; a horizontal fold keeps them in the same column.
- Count before drawing: On the grid, locate matching endpoints first, then connect them to create reflected segments.
- Discuss incorrect examples: Ask students which condition fails and how the arrangement could be corrected.
What Correct Student Work Should Show
On the mirror-mark matching worksheet, the five answers are 1-D, 2-C, 3-E, 4-A, and 5-B. The following multiple-choice answers are B and A, and the vocabulary blank is completed with distance. On the grid worksheet, the reflected line segments should appear on the right at equal distances from the dashed fold. Its two multiple-choice answers are B and A.
For the final challenge, cards A, C, and E belong under Mirror Match, while B, D, and F belong under Not a Mirror Match. The multiple-choice answers are B, A, and C. For the last written response, students could move the right-hand dot to two squares from the fold or move the left-hand dot to four squares from it, keeping both on the same row. Accept equivalent explanations that preserve the reflection rules.
Print and Practice During a Winter Math Lesson
These black-and-white pages are suitable for individual practice, small-group instruction, math centers, or homework. Print the matching page for an introduction, the grid page for hands-on practice, and the challenge page for a follow-up assessment. Students can use a pencil and ruler for the drawing activity and check distances by counting grid squares. Together, the three worksheets offer a focused winter geometry lesson that moves beyond recognizing symmetrical pictures to understanding how mirror images are constructed.